Add a player
Danger
This walkthrough is seriously out-of-date. It will be updated in the near future.
Warning
For this walkthrough, we are assuming you are following on from the Rendering textures walkthrough.
The rendering textures tutorial introduced rendering a player texture as part of the world’s render loop. Obviously in a full game we can not be placing rendering and update logic for every object in the world, so we need some way of abstracting these concepts apart.
Entities are the concept that seperates individual instances of “things” in the game world; everything from players to enemies are encapsulated as entities.
Note
For more information about the exact sequence of Update and Render calls on entities, refer to the Updating and rendering documentation.
Defining a new entity
Now we need to define a new player entity. Entities are defined by
implementing the IEntity interface. The most simplest entity that we can
define (that also does nothing), is:
using System;
using Protogame;

namespace MyGame
{
    public class PlayerEntity : IEntity
    {
        // This is the constructor for the player entity.
        public PlayerEntity()
        {
        }

        // These properties indicate the X, Y and Z position of the entity.
        public float X { get; set; }
        public float Y { get; set; }
        public float Z { get; set; }

        // This is the update method called by the world manager during the update loop.
        public void Update(IGameContext gameContext, IUpdateContext updateContext)
        {
        }

        // This is the render method called by the world manager during the render loop.
        public void Render(IGameContext gameContext, IRenderContext renderContext)
        {
        }
    }
}
Add a new class to your project that matches this definition, such that the entity is called PlayerEntity.
Add a factory method
To create entities at runtime while still allowing them to be dependency injected, you need to create a factory method. The implementation of the factory is automatically provided to you by Protogame; you just need to add the method so that you have a way of instantiating the entity.
Modify the IEntityFactory interface in the project so that it has a method
to create a player entity:
using System;
using Protoinject;

namespace MyGame
{
    public interface IEntityFactory : IGenerateFactory
    {
        ExampleEntity CreateExampleEntity(string name);

        PlayerEntity CreatePlayerEntity();
    }
}
Creating the player entity
Now that we have set up our interfaces, we can begin to create the entity in our existing world.
Modify the constructor of the world to create an instance of PlayerEntity
using the new CreatePlayerEntity method.
The world’s constructor should now look similar to this:
public MyGameWorld(
    I2DRenderUtilities twoDRenderUtilities,
    IAssetManagerProvider assetManagerProvider,
    IEntityFactory entityFactory)
{
    this.Entities = new List<IEntity>();

    _renderUtilities = twoDRenderUtilities;
    _assetManager = assetManagerProvider.GetAssetManager();
    _defaultFont = this._assetManager.Get<FontAsset>("font.Default");

    // You can also save the entity factory in a field and use it, e.g. in the Update
    // loop or anywhere else in your game.
    var entityA = entityFactory.CreateExampleEntity("EntityA");
    entityA.X = 100;
    entityA.Y = 50;
    var entityB = entityFactory.CreateExampleEntity("EntityB");
    entityB.X = 120;
    entityB.Y = 100;

    // Don't forget to add your entities to the world!
    this.Entities.Add(entityA);
    this.Entities.Add(entityB);

    // This pulls in the texture asset via the asset manager.  Note that
    // the folder seperator from "texture/Player" has been translated
    // into a single dot.
    _playerTexture = _assetManager.Get<TextureAsset>("texture.Player");

    // Add the player entity.
    this.Entities.Add(entityFactory.CreatePlayerEntity());
}
Testing the player
If we now run the game and set a breakpoint in the IDE appropriately (as indicated by the screenshot below), we will see the player entity in the world’s entity list:
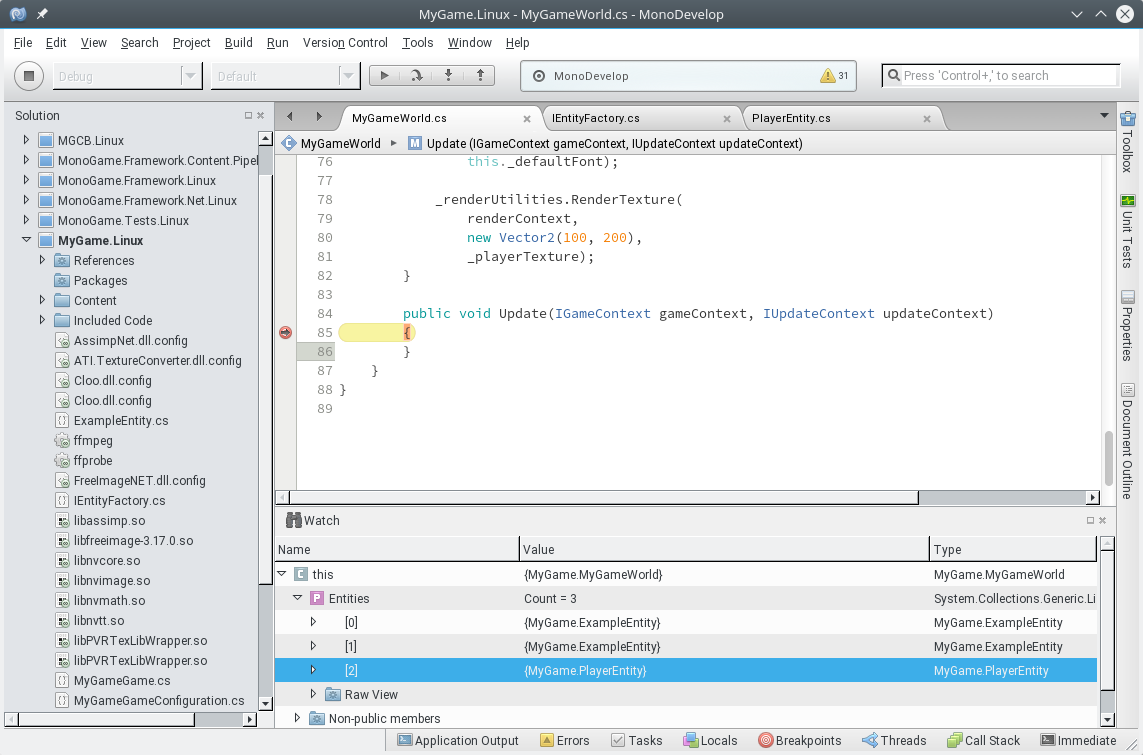
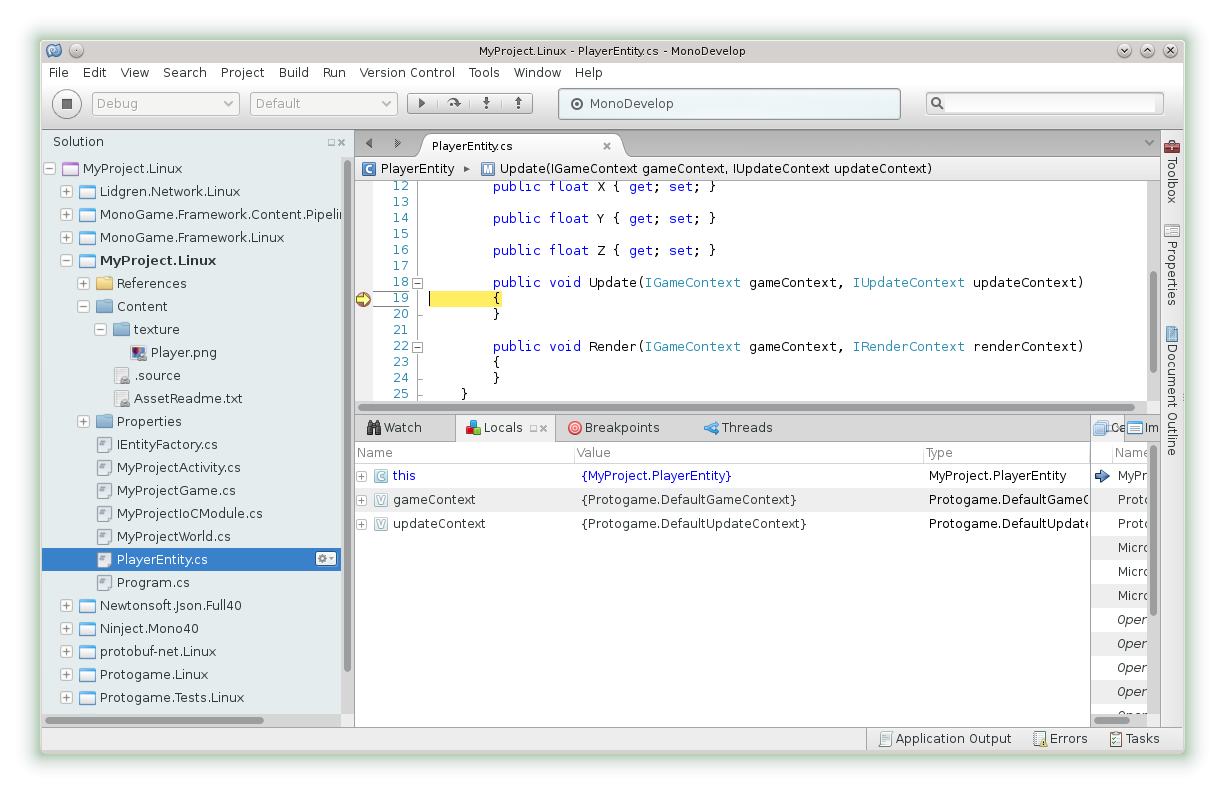
If we place a breakpoint on the entity’s Update method, we can see that it is also hit as the game runs:
Rendering the player
Now let’s make our entity appear on screen. To do so, we need to render a texture as part of entity’s Render call.
The process is very similar to what is described in Rendering textures. If you have not read that walkthrough, we highly recommend you do so.
In the same way that we rendered a texture in the world, we’re going to render a texture in the entity. To recap, we needed to follow four steps:
- Inject the
I2DRenderUtilitiesinterface. This provides the API to render the texture.- Inject the
IAssetManagerProviderinterface. From this we can gain access to the asset manager, and from there gain access to our texture asset.- Gain a reference to the texture asset within the entity’s constructor.
- Call the
RenderTexturemethod againstI2DRenderUtilitieswithin the render loop.
Adjusting the render code
This results in an entity definition that looks similar to the following:
using System;
using Microsoft.Xna.Framework;
using Protogame;

namespace MyProject
{
    public class PlayerEntity : IEntity
    {
        // This is the field where we keep a reference to the 2D render utilities.
        private readonly I2DRenderUtilities m_2DRenderUtilities;

        // This is the field where we keep a reference to the player texture we will render.
        private readonly TextureAsset m_PlayerTexture;

        // This is the player constructor.  Both parameters are automatically dependency
        // injected when we call CreatePlayerEntity on the entity factory.
        public PlayerEntity(
            I2DRenderUtilities twodRenderUtilities,
            IAssetManagerProvider assetManagerProvider)
        {
            // Keep the 2D render utilities around for later.
            this.m_2DRenderUtilities = twodRenderUtilities;

            // Some implementations might assign the asset manager to a field, depending on
            // whether or not they need to look up assets during the update or render
            // loops.  In this case we just need access to one texture, so we just keep
            // it in a local variable for easy access.
            var assetManager = assetManagerProvider.GetAssetManager();

            // Retrieve the player texture.
            this.m_PlayerTexture = assetManager.Get<TextureAsset>("texture.Player");
        }

        public float X { get; set; }
        public float Y { get; set; }
        public float Z { get; set; }

        public void Update(IGameContext gameContext, IUpdateContext updateContext)
        {
        }

        public void Render(IGameContext gameContext, IRenderContext renderContext)
        {
            // This check is not strictly required when using a 2D world manager, but it
            // is recommended in case you want to change to a 3D world manager later on
            // down the track.
            //
            // You can not use I2DRenderUtilities when the render context is 3D (and
            // vica-versa; you can not use I3DRenderUtilities when the render context
            // is 2D).
            if (renderContext.Is3DContext)
            {
                return;
            }

            // Render the texture at our current position.
            this.m_2DRenderUtilities.RenderTexture(
                renderContext,
                new Vector2(this.X, this.Y),
                this.m_PlayerTexture);
        }
    }
}
Viewing the result
If you now run the game, you will see the following on your screen:
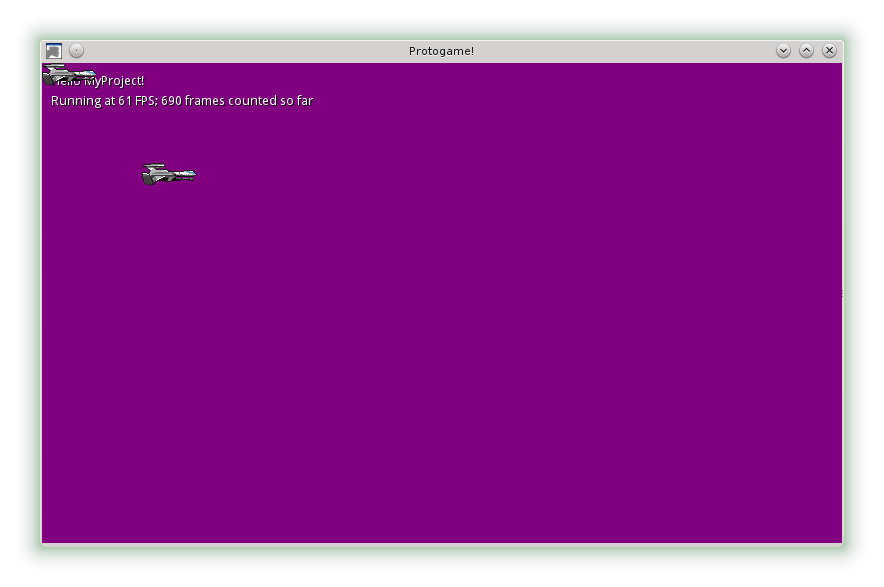
Warning
The texture being rendered at position 100, 100 is due to the render texture call made in the world. You will see this if you are following on directly from the rendering textures tutorial. The texture in the top left of the screen is the texture being rendered by the player entity (due to it’s X and Y position being initially 0, 0).
Updating the player
Now that we have our player entity rendering, let’s do something with it. We won’t yet cover handling input from the player (that is discussed in Handling input), but we will make it move around the screen on it’s own.
We are going to make the following changes to our entity:
- It will be initially positioned at 300, 300.
- We will make it’s X position the result of a sine wave, with an increasing counter as the input value.
Modify the entity’s code so that Update loop matches the following code, and that the specified field is defined:
// This is our new counter field that we increment every frame.
private float m_Counter = 0;

public void Update(IGameContext gameContext, IUpdateContext updateContext)
{
    // Increments the counter.
    this.m_Counter++;

    // Adjust the X and Y position so that the X position deviates 50
    // pixels either side of 300 as the game updates.
    this.X = 300 + (float)Math.Sin(MathHelper.ToRadians(this.m_Counter)) * 50;
    this.Y = 300;
}
Viewing the animation
When running the game, you should get a result that looks similar to the following video:
Next steps
We recommend continuing onto the next walkthough, Handling input.